
assembly instructions
PREPARATION OF PIPES AND PIPE FITTINGS
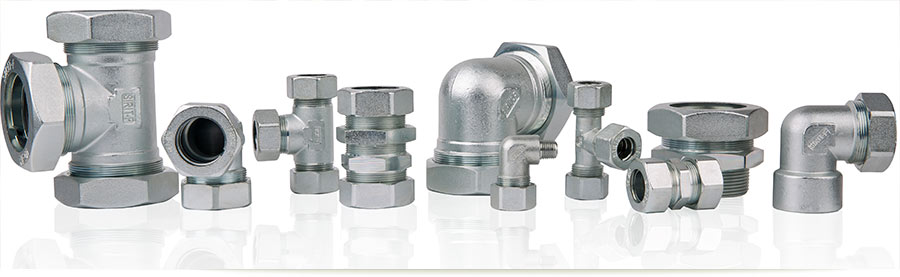
RTAU/SIRIT connections ensure optimal sealing not only between not perfectly aligned pipes (allowed axial deviation ±4°) but even in case of irregular pipe tolerances both as regards the actual external diameter, roughness and possible ovaling. In addition, contrary to other types of joints, it is unaffected by vibrations and thermal stress.
Prepare the pipe by cutting its end at 90° and removing the burrs which may damage the O-ring (max chamfer 0.2x45°).
Avoid slanted cuts.
The final part of the pipe to be connected to the pipe fitting should not present ovalizations or
damages. Always make sure that the pipe fitting and the pipe are clean.
ASSEMBLY
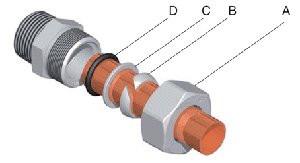
The assembly of the pipe fittings is very easy and is performed by inserting their components on the pipe in the following order. First install the nut (A), then the conical ring (B) which, by tightening in the nut seat, firmly locks the pipe, thus avoiding its disconnection and ensuring its mechanical seal. Then, fit the protection washer (C) and finally the O-ring (D). The latter, being compressed by the washer housed in its seat on the union mouthpiece, ensures its herme- tic sealing. Tighten the nut (A) according to the torque value specified in the page TECHNICAL DATA. NOTE: Follow assembly instructions below.
assembly instructions
First install the .SDA nut on the pipe in the correct direction then fit the .SAC conical ring and finally the .SPR washer and the .SOR O ring. Insert all the way in the pipe with its components into the proper seat on the joint body. For joints without a rabbet, we recommend inserting the pipe for at least 15 mm.
Holding the pipe in place, slide the .SOR O-ring on till it is flush to the seat. The .SPR washer should rest on the .SOR O-R. After sliding on the .SAC conical ring, tighten the .SDA nut. TIGHTEN THE NUT ACCORDING TO THE RECOMMENDED TORQUE VALUES (page TECHNICAL DATA).
Before laying make sure there are no axial deviations exceeding ± 4°.
Make sure to install clamps on the pipes near the joints, especially in case of long piping. We recommend to install the clamps at about 200 mm from the joint.
For pipes bent close to the connection with the joint nuts, leave a straight space between the pipe end and the elbow which is at least twice the height of the .SDA nut.
The conical threads do not ensure an hermetic sealing. In order to obtain a leak-proof hermetic sealing, use additional sealing products such as PTFE tape or “Loctite” sealing paste.
DIMENSIONS: The quotations of the catalogue tables are given only for reference.
TOSI F.lli reserves the right to amend such information for technical reasons.
Fraz. Roccapietra - Zona Industriale
Via Monte Rosa, 1
13019 VARALLO (VC)
![]() made in ITALY
made in ITALY